


My kids LOVE centers in music class, and I do too! They are fun, engaging, and perfect for a low-key day in the music room. However, there needs to be some prep work done ahead of time to make sure your centers run smoothly. Jumping into centers or stations without preparing your students is a recipe for disaster. Here are three steps you need to take to ensure a successful and enjoyable experience in music centers for you and your students.
Practice, Practice, Practice!
The first step for success in centers is to practice everything with your students. EVERYTHING. Moving to centers, how to work with each other, cleaning up, you name it. Practice it all! Never assume that your kids will know what you want them to do, no matter how obvious it is to you!
Whenever I introduce a new activity to my classes, I always walk them through the steps as a class. First, I show them what materials they will need and how to get them. Using color-coded bins and containers helps so much. My students sit on colored SitSpots on the floor, and I try to make all of their materials match their dot colors. I even try to get matching materials, like erasers and dry-erase sleeves. It’s a bit of an obsession!
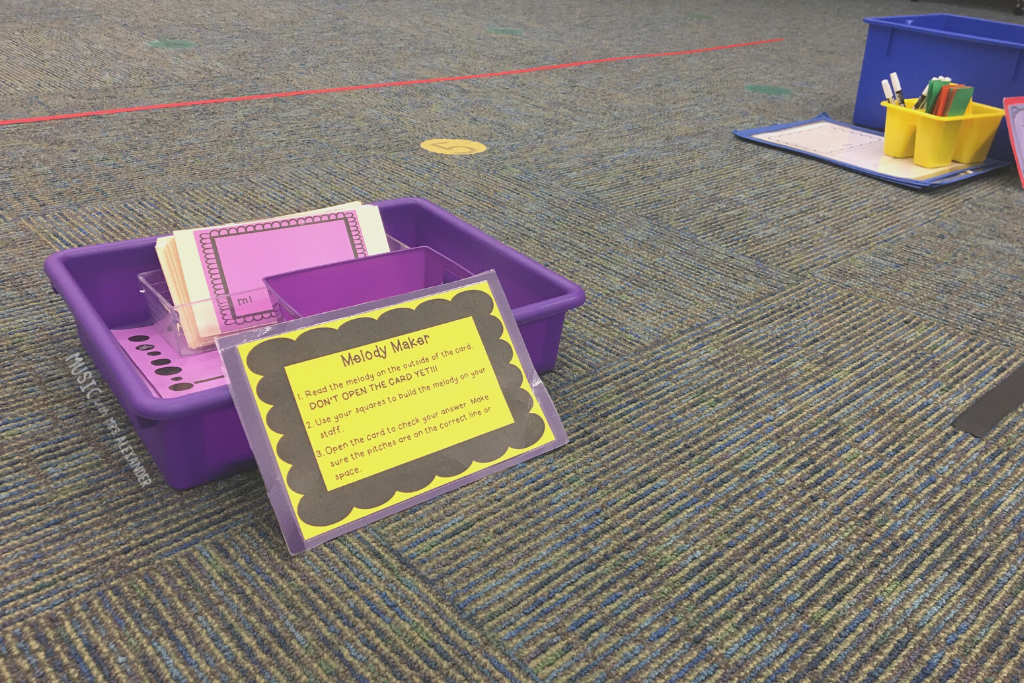
Then, we work through each step of the activity together. I explain it, my students complete the task, and I check to see if they are on the right track. In our Melody Maker station, I make sure they read the outside of the melody card first. Their first instinct is to open the card, but the answers are on the inside! In fact, I made sure to write “DON’T OPEN THE CARD YET!” in bold and all caps in the instructions. Sometimes that isn’t enough, which is why we practice!
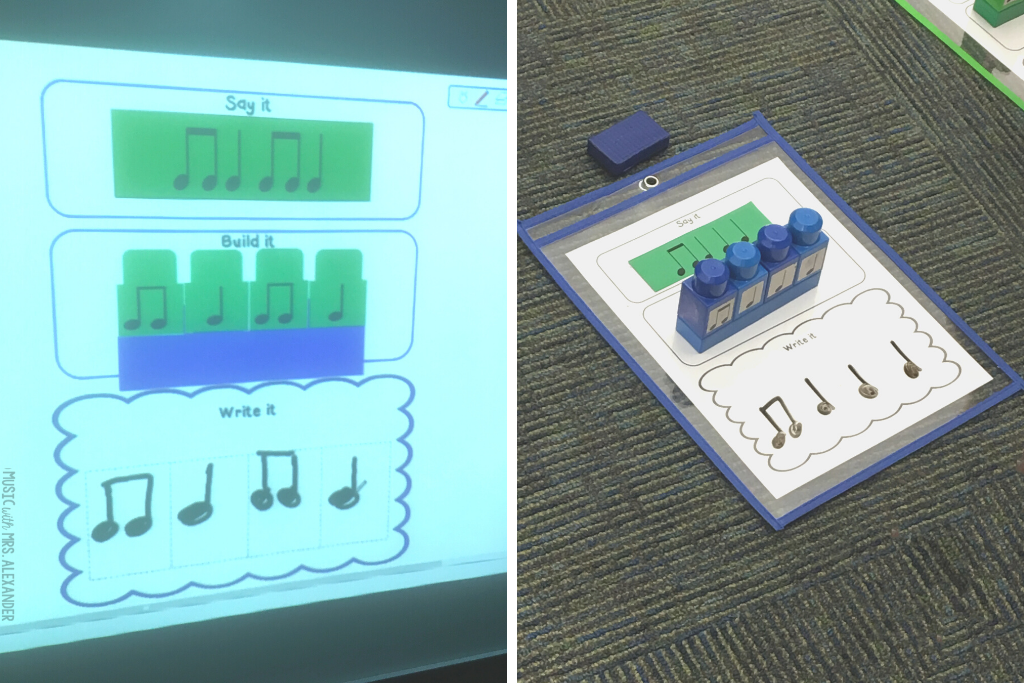
Once we’ve practiced each step, my students work on the activity while I walk around the room. Supervised practice gives them a chance to work independently, but I’m there just in case they need help. Before they begin, we talk through the instructions again to ensure they know what to do. I also put the directions or an example of a finished product on the Smartboard screen. We usually work for about five minutes before we begin cleaning up.
I also make sure we practice putting materials away at the end of our activity. I typically have four classes of the same grade level in a row with zero passing time, so I need my students to help me reset the room for the next class.
Again, the color-coding by SitSpots helps so much with keeping everything organized. Each group has a place to bring their materials, and I always have the right amount of supplies. Which leads me to my next point…
Set Up Materials Ahead of Time
I can’t stress this enough. Having everything ready to go makes centers run much more smoothly. I have a variety of carts and tables in my room that I use to stage materials to have them ready for my students. A few summers ago, I found these wide carts at Target and spruced them up with vinyl lettering. It’s great for having everything I need for a grade level at hand.
I can set it up the day (or week) before, then roll that bad boy out of sight! When I need the materials, I move the cart to the front of the room and have my students get what they need. I even use the colored SitSpots lines to set out materials that don’t fit well on a table, like our rhythm block bins. Since the lines are reusable and repositionable, I can lay them down anywhere in the room. This setup keeps my kids from piling up in one place to get materials. Plus, it’s a nice visual cue for my students who need a little extra help. You sit on a red dot? Get the RED bin that’s sitting on the RED line. Easy peasy!
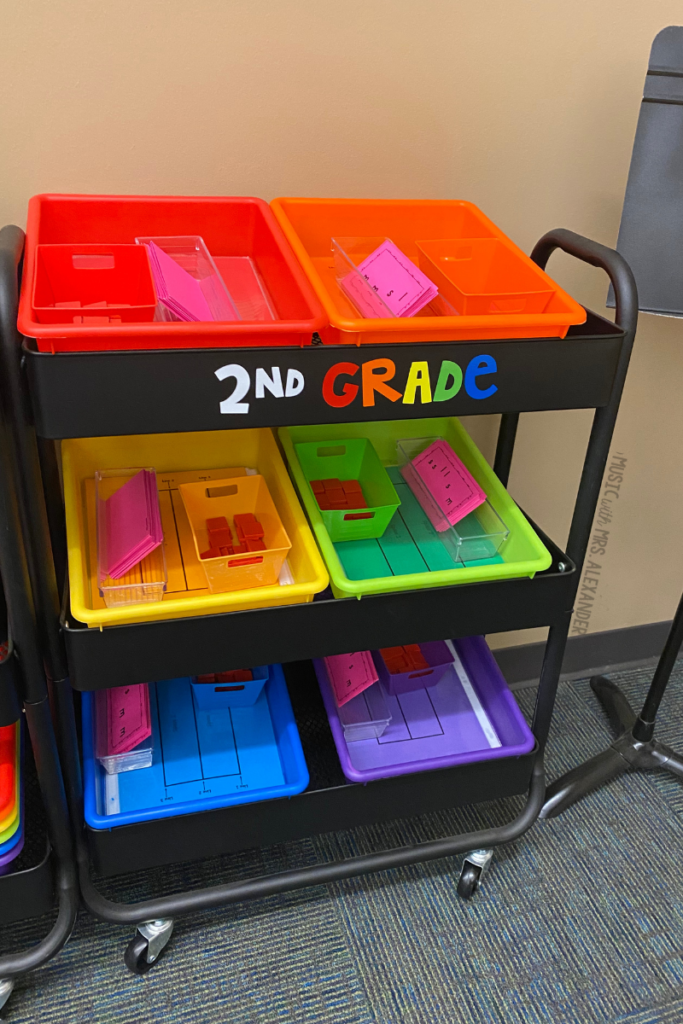
Speaking of color-coding–it has been a lifesaver in my classroom! My students are in six color groups: red, orange, yellow, green, blue, and purple. I try to make all of our materials match those colors to make it easy for my students to know which ones are theirs. From blocks to erasers to cups to music staves–they are all Roy G. Biv. My teacher friends say I’m obsessed!
To make it easier for my students to move materials, I use plastic bins and containers that match each color group. My absolute favorite bins are the ones from the Target Dollar Spot. They usually show up around early July and are in stock until September. Dollar Tree and Big Lots don’t usually have rainbow bins, but they have several kinds of small black containers and trays. Those are perfect for smaller supplies like dry erase markers or craft sticks.
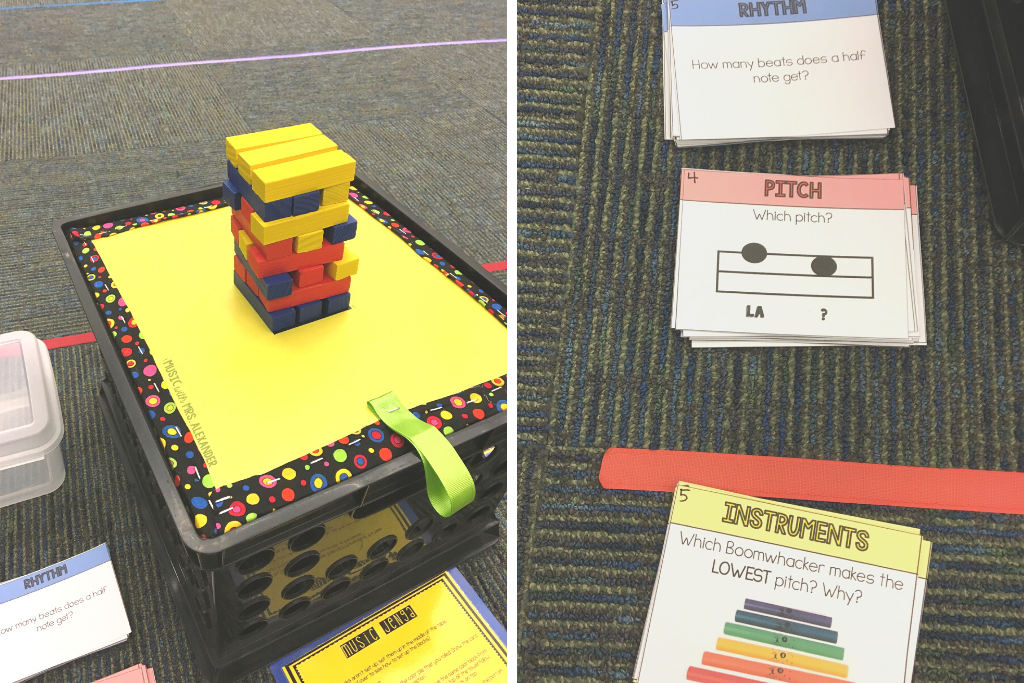
It may sound obsessive to some, but I count out EVERYTHING to make sure each student has enough. For example, the patterns in our Melody Maker station have between four and six pitches. I make sure each student has eight bingo chips because one or two will inevitably disappear. I also put a few extra dry erase markers at each station if one runs out of ink in the middle of class. Attention to the little details maximizes your class time and minimizes interruptions.
Have Clear Expectations
Another critical step in preparing your students for centers in music class is making expectations known from the beginning. As I mentioned in the previous step, we do a “dry run” together, which gives me the chance to take them step-by-step through my expectations for the activity. I can model expected behavior and correct any hiccups along the way. For instance, one of my rules for every center activity is that our materials are tools, not toys. I have to stress this upfront because many of the tools we use in class for centers could definitely be considered toys. We talk about where to keep materials while working to avoid the temptation to play with them. I also give lots of positive reinforcement to students who use materials correctly. If a student does not follow the rules in centers, they get several warnings before I remove them from the activity. Since classes are 30 minutes long, they only sit out for 2-3 minutes before returning. As harsh as this sounds, it’s necessary. We want our students to have fun in centers, but we also need them to know the right way to have fun.
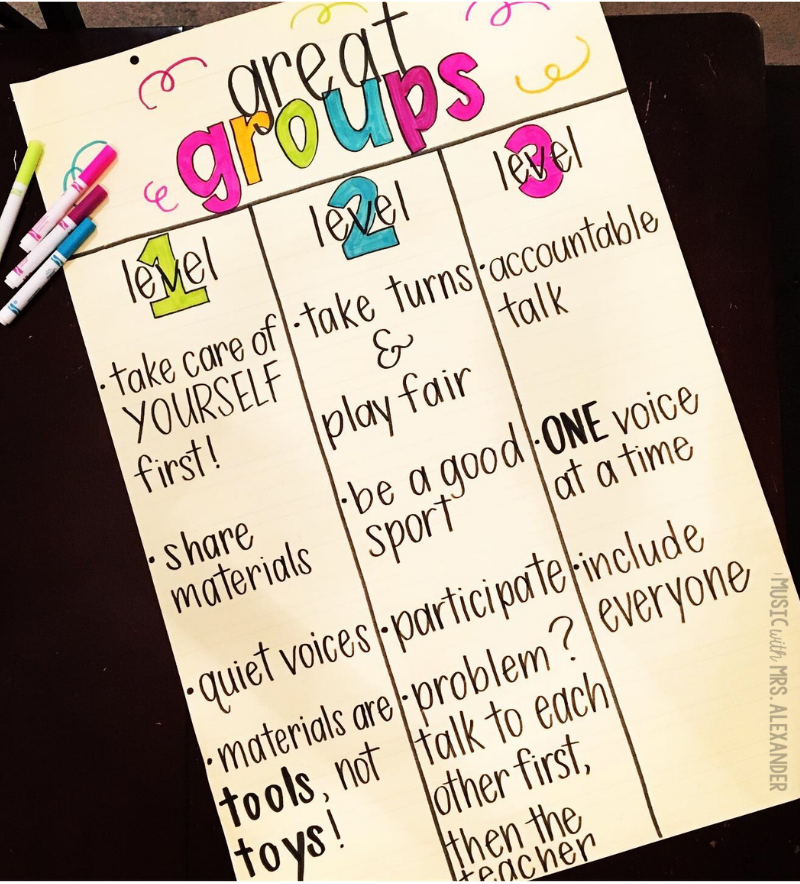
Like any skill, many of my students need practice working in groups. We spend time every few weeks practicing how to talk to each other and how to handle disagreements when they occur. I created this anchor chart to help them remember the most important parts of working with a partner or a group. I divided the chart into levels (because they sure do love a game!), and we have to master each level before moving on to the next one. Of course, this chart isn’t an extensive list of every possible circumstance, but it covers what I feel is most important for working cooperatively.
I hope this post has helped you prepare for introducing centers into your elementary music classroom. They are great for practice and review while providing a little downtime for you and your students! Are you wondering how to find time in your lesson plans for including music centers? Check out this blog post on planning your curriculum for the year and grab a FREE K-2 music curriculum outline here!
One Response