


Introducing the concept of pitch to your youngest students may seem like a daunting task. No matter how much you plan, you feel like they are just not getting it. Lessons are falling flat, and your students aren’t engaged. Trust me, I understand! It took several years of trying different strategies (and failing sometimes) to create a successful framework for teaching pitch in my K-2 music classes. If you are struggling with teaching high and low in your elementary music classroom, I have a few tried and true strategies that can help you create a successful plan of your own!
Make it visual!
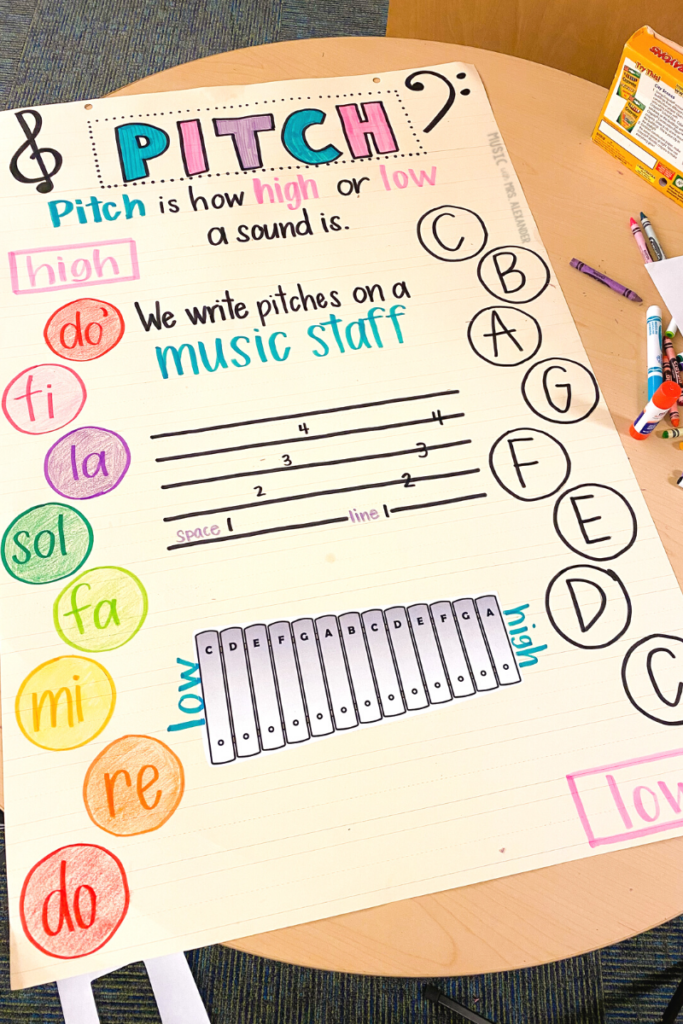
Pitch ladders
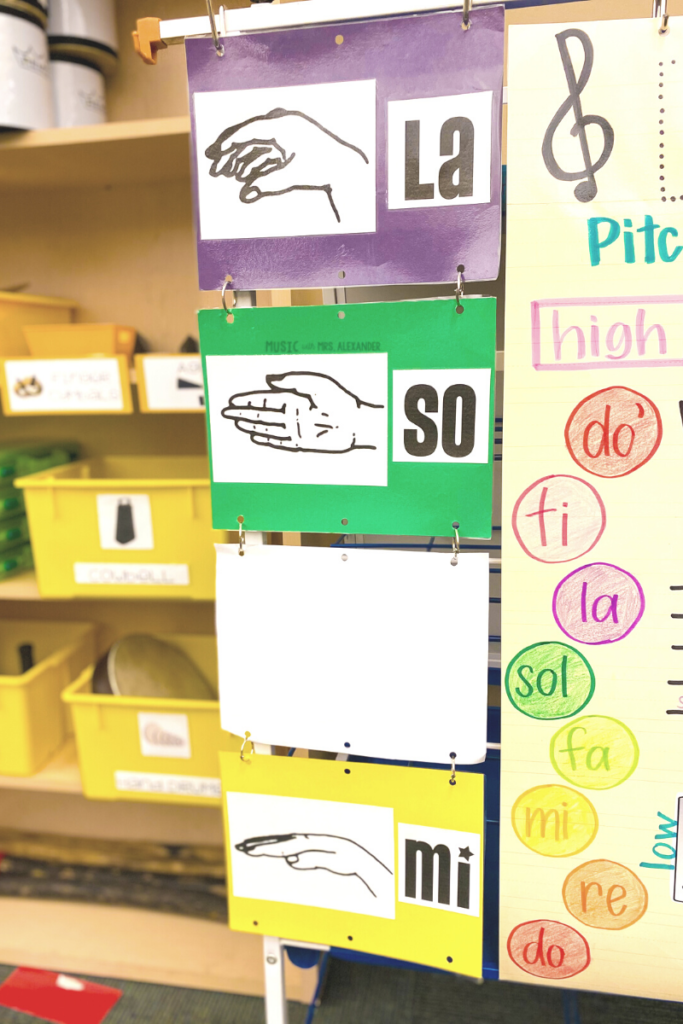
Using graphics and other visuals is crucial when teaching about pitch. They take an auditory concept and give it a visual component, allowing the teacher to reach more learners. Pitch ladders are an easy way to give students a visual representation of higher and lower sounds. I have two that stay on display year-round in my classroom: one next to my interactive whiteboard and another portable one on an anchor chart stand. Whenever we discuss pitch, my students know to refer to those charts if they need to. I experimented with different display options (vertical vs. horizontal), and my students understood and responded better when I arranged pitches vertically from high to low. I wanted to get them used to the left-to-right orientation to reinforce how the bars appear on the Orff instruments, but it confused many of my kids. Instead, I use an anchor chart to remind my students where high and low pitches are on barred instruments. Speaking of anchor charts…
Word wall/anchor charts
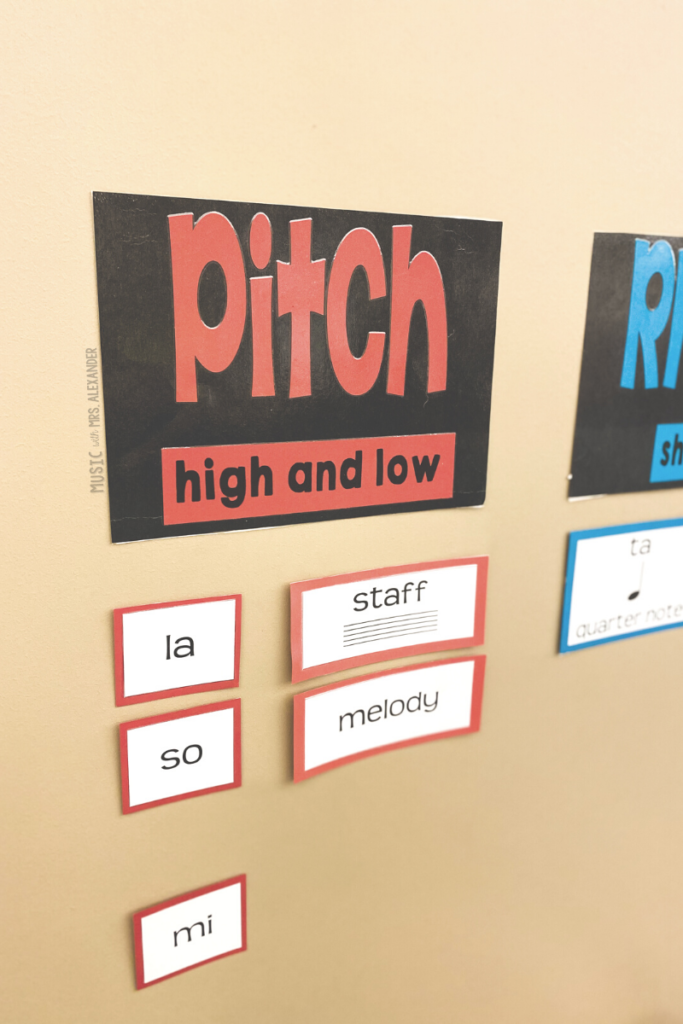
My word wall and anchor charts are two more visual reference tools we frequently use in the music room. As I mentioned in this post, I color-code my word wall by topic to help students quickly find what they need. Whenever we talk about pitch, I have my students point out its section on the word wall. I hope that by modeling this during instruction, my students will remember to use the word wall when they work independently. For my anchor charts, I use drawings and other graphics to explain and define our pitch vocabulary. Plus, they are a more mobile version of the word wall. I can move them wherever I need to in the room, and my kids can easily walk up to them to access information.
Iconic notation
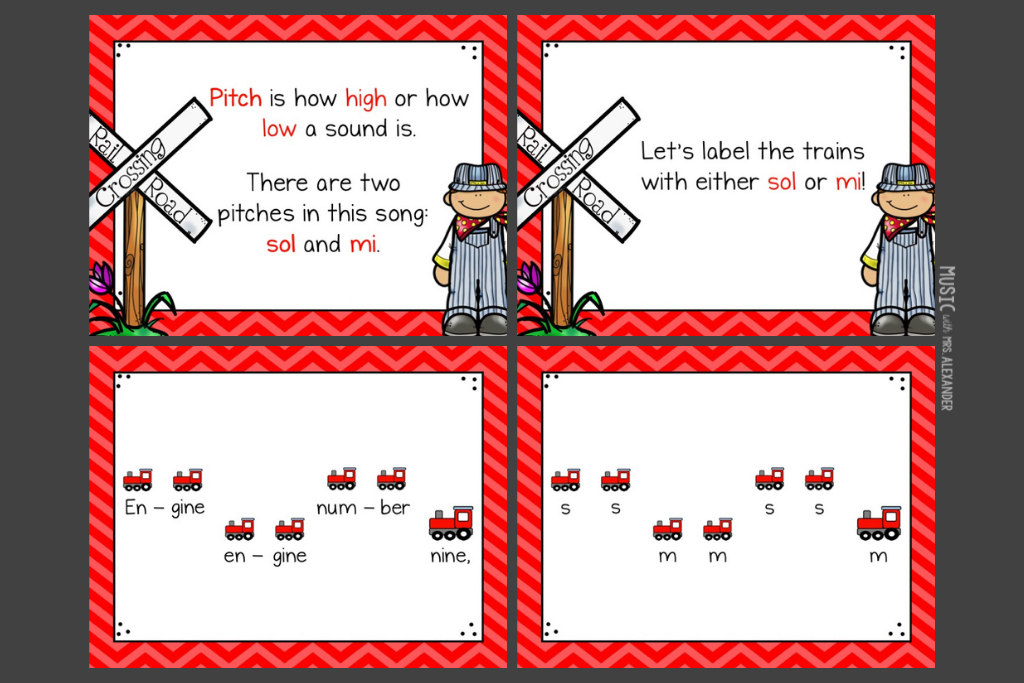
I am a HUGE advocate for iconic notation, especially with the younger grades. This involves using pictures (icons) to represent each pitch. I always start with icons before moving to standard notation. You can use pretty much anything you’d like as an icon. I like using pictures that match the song we’re singing, like trains for Engine, Engine, Number Nine, or apples for Apple Tree.
Use manipulatives when teaching high and low.
Bingo chips
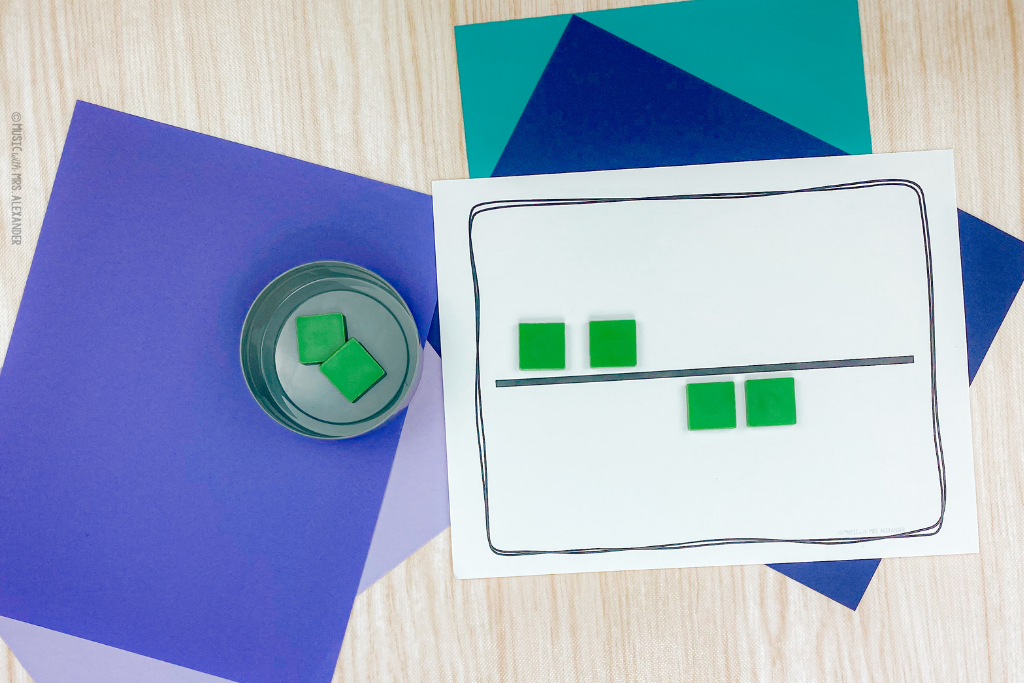
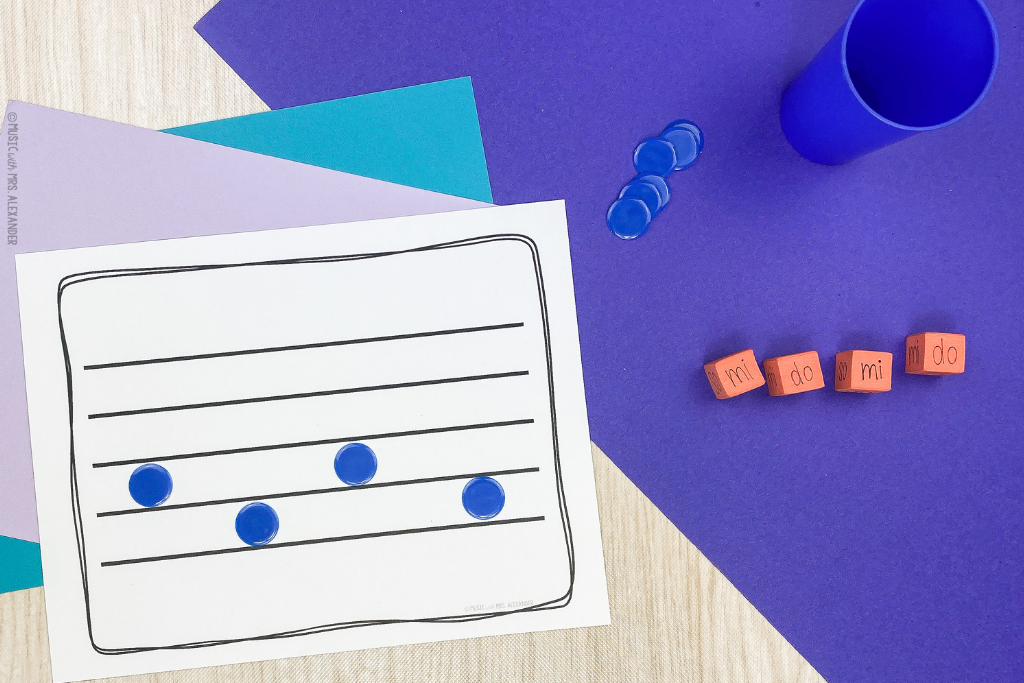
Manipulatives are the MVPs of my classroom! I need my students to touch and feel whenever they learn something new, and learning about pitch is no exception. Over the years, I have collected many free/cheap items to create a tactile experience for practicing high and low. Upcycled math manipulatives are my favorites, like bingo chips and counting squares. We use these to notate patterns on modified versions of the music staff.
Foam dice
Blank foam dice are very useful when teaching about pitch, especially in music centers. I found these dice at Dollar Tree and used an ultra-fine Sharpie to write pitch names on them. They come in a pack of 50 with four different colors–I use the green ones for mi/sol/la, the orange for do/mi/sol/la, and the red for do/re/mi/sol/la. (Color-coding and I are BFFs, by the way…)
In this center activity, students roll the dice, then write the pitches on the staff. Once they have their melody written down, they go to an instrument to play it. I like using the resonator bells on the step stand because they can reinforce the low-to-high relationship in two ways: the left-to-right orientation of melodic instruments and the high/low through using the steps on the instrument’s stand.
Use instruments (if available) to teach high and low.
Using instruments to reinforce the concept of high and low is another way to reach your kinesthetic and auditory learners. I am lucky to have a wide variety of pitched percussion instruments in my classroom, as well as a complete set of Orff instruments. We use these extensively when learning a new pitch. If your budget is limited, there are less expensive options for your classroom that allow your students to use instruments when exploring high and low sounds. For example, my students have used drinking straws to create pan pipes. We cut straws of different lengths and taped them together. Then, they blew across the top of the straws to make a sound. This activity helped them understand how size affects the sound an instrument makes–longer straws, lower sound! Here are two more instrument activities I’ve used for teaching pitch in my classroom:
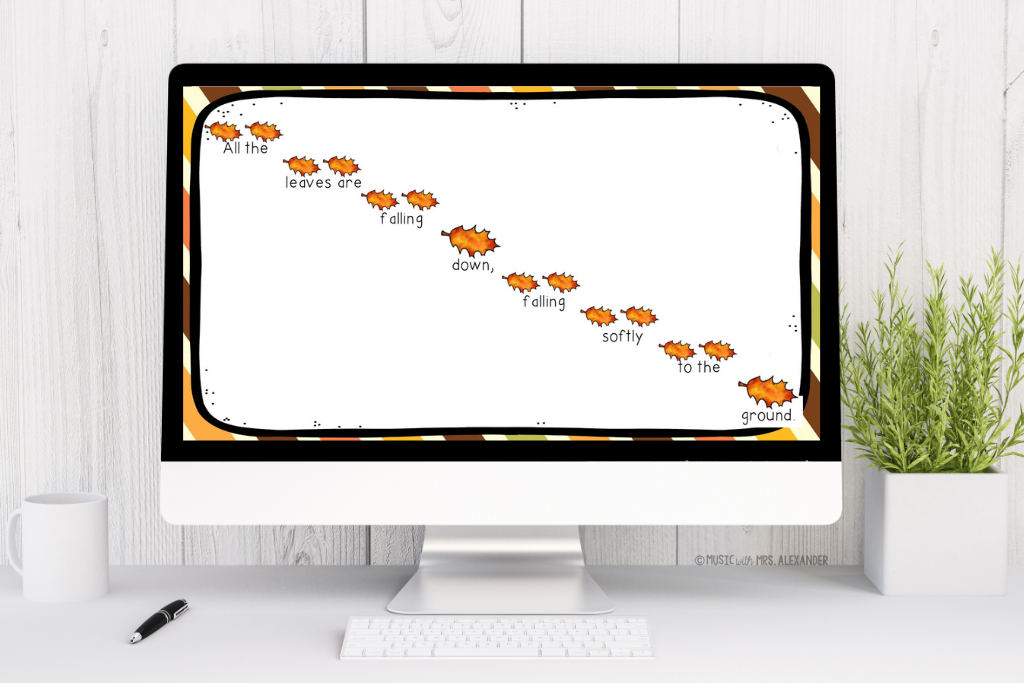
Leaves
As I mentioned in this blog post, Leaves from First Steps with Orff has been my go-to for introducing the Orff instruments to my first graders. It is also perfect for reinforcing the concept of higher and lower pitches. I start this lesson by playing ascending and descending patterns on the piano. After demonstrating first, I ask my students to listen carefully and move their bodies to the music. We talk about how their bodies match the sounds they hear. Then, we move to the xylophones and play descending/ascending patterns while singing. Once they are comfortable singing and playing without my help, half the class plays the melody and sings, while the other half moves higher and lower like leaves in the wind.
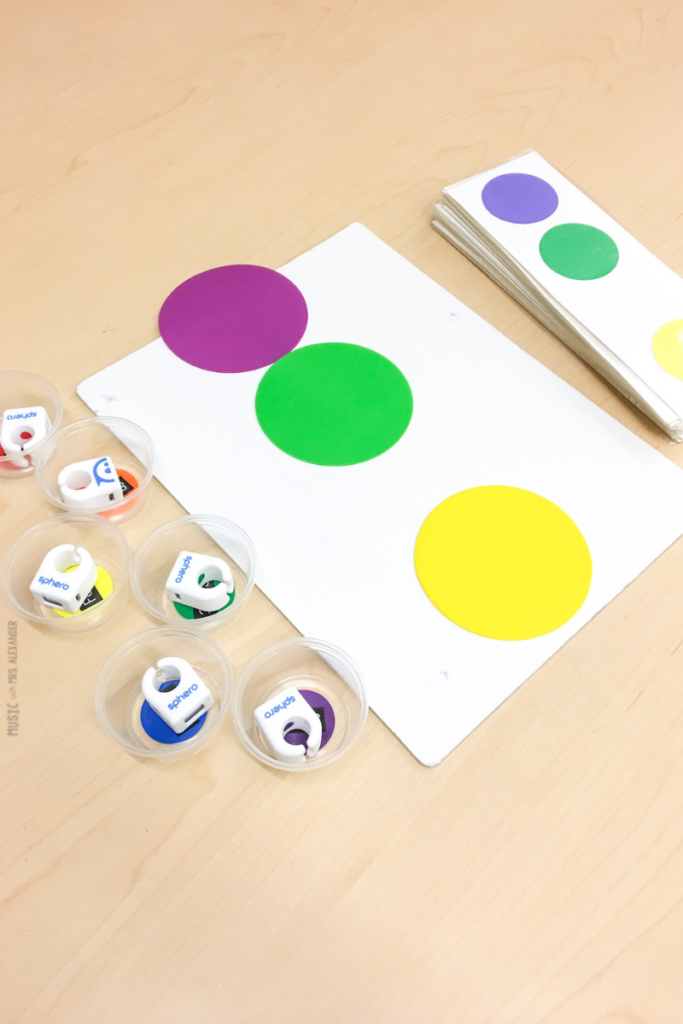
Specdrums
Specdrums are one of my new favorite toys in the music room! They are a great way to introduce and reinforce the concept of pitch. For this lesson, I created tone ladders using watercolor paper and cardstock circles of different colors. I showed my students the tone ladders and told them we would practice singing some high and low patterns while tapping the dots, sort of like pressing the buttons on a remote control. Then, I showed them how the Specdrums worked–the looks on their faces were priceless! The rings connect to my iPad via Bluetooth and are programmed to play different sounds when tapped on different colors. Tapping the green circle plays the pitch sol, and the yellow one plays mi.
Songs for teaching high and low
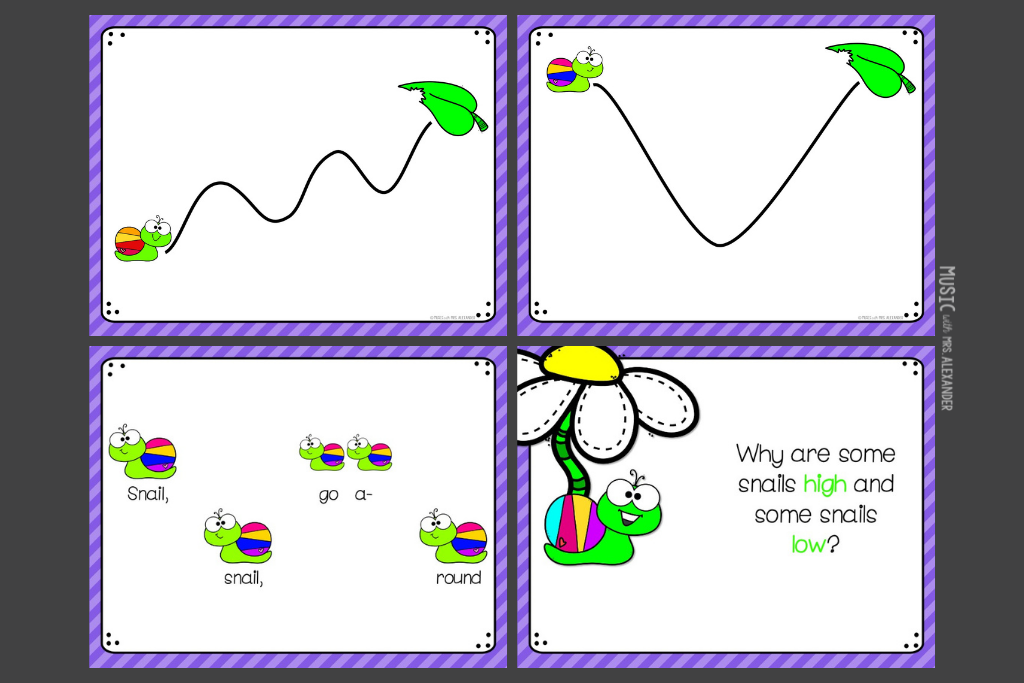
Snail, Snail
I like using Snail, Snail for both vocal explorations and for teaching sol and mi. The snail vocal exploration cards are great for getting the littles into their head voices. Plus, they can work with a partner to create their own “snail patterns” using a dry erase board and marker. One partner draws a pattern, the other partner sings it. Switch jobs and repeat!
The melody of the song is simple enough for young students to hear and notate. Use any manipulatives you have on hand (bingo chips, mini erasers, etc.) and have your students notate the melody. Depending on where you are in your curriculum, students can simply put the pitches higher and lower on a plain sheet of paper or on a standard/modified music staff.
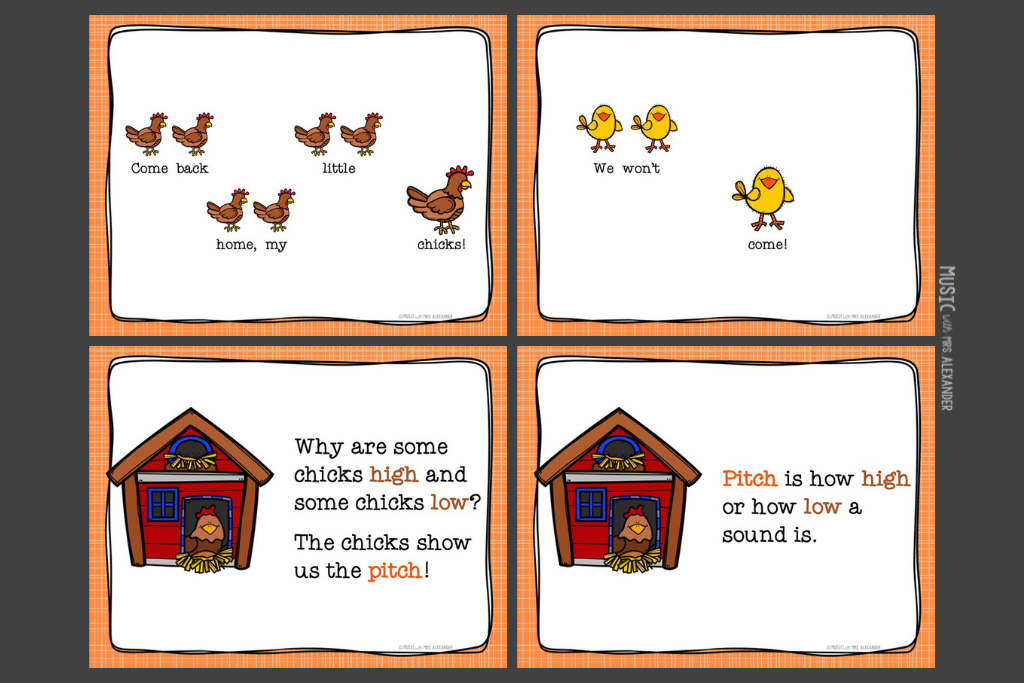
Come Back Home My Little Chicks
Come Back Home My Little Chicks is a fun echo song we learn early in first grade. Plus, there’s a circle game that goes with it! I start by teaching the response–we echo the phrases, and I add movement to help my students remember the words. Once they are comfortable with that part, we sing the song in call-and-response form. I sing the call, and they sing the response. Then, we play the game. After a few rounds of the game, they are usually ready to sing both parts by themselves!
Engine, Engine, Number Nine
Engine, Engine, Number Nine is one of those songs I use to teach a TON of different concepts: steady beat, beat vs. rhythm, high/low, tempo, you name it! We start by learning the song and playing the steady beat while singing. Then, we create “trains” and march around the room while singing and playing. In the next lesson, we review sol and mi, notating the song using manipulatives on the music staff.
I have complete, ready-to-teach units for all three of these songs in my Teachers Pay Teachers store. Click the links below to check them out!
Come Back Home My Little Chicks
I hope this post has given you a starting point for creating a plan for teaching high and low in your elementary music classroom. Need some ideas for planning the rest of your curriculum? Grab a FREE copy of my sample scope and sequence here! Looking for no-fuss, ready-to-teach lesson plans for your K-2 classroom? Check out my quarterly and semester lesson plan bundles for kindergarten, first grade, and second grade!
2 Responses